Use Postman and Azure AD to send REST request to SharePoint Online
Postman is a very useful tool when using REST API in your developments. It allows you to create every HTTP request you can think of and get / format responses. That’s why every SharePoint developer should use it, since SharePoint exposes a very nice REST API since SharePoint 2013. Postman is pretty straightforward to use with SharePoint 2013 / 2016 using NTLM authentication. It “just works”. With SharePoint Online, you have to use OAuth2 as the authorization protocol. To do that, you can either register Postman as an add-in in SharePoint, as explained here, or you can register an application in Azure AD, which is what we will cover in this post.
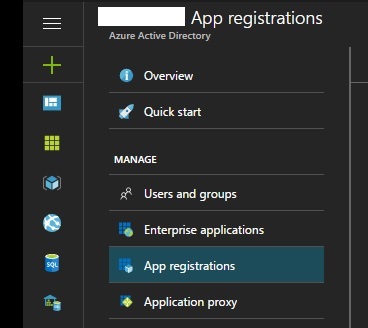
Register an application in Azure AD
First, we have to register an application in Azure AD to get an Application ID, a Key, and set permissions. Log in the Azure Subscription linked to the Azure AD used by your Office 365 tenant, and create an App registration.
You’ll be asked for the following properties
Name:              <Friendly name>
Application type:  Web app / API
Sign-on URL:       https://www.getpostman.com/oauth2/callback
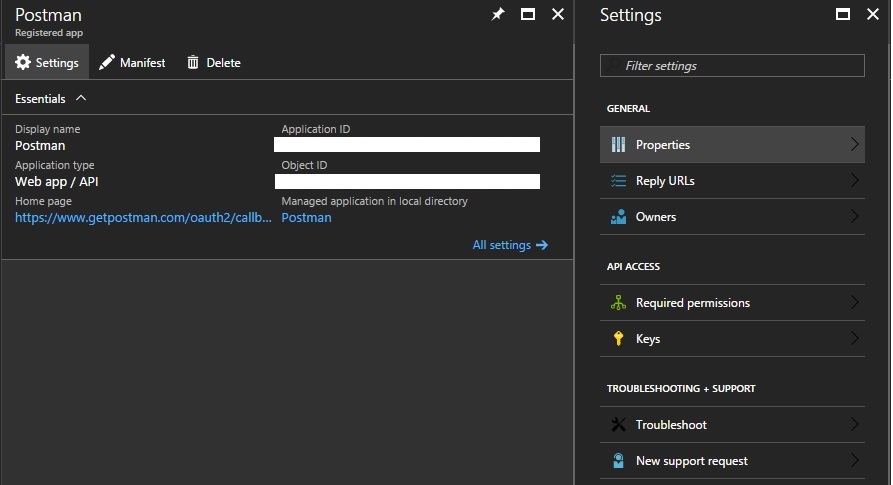
Once your application is registered, get the Application ID in the settings page.
Then, go to Required permissions to grant permissions to your application.
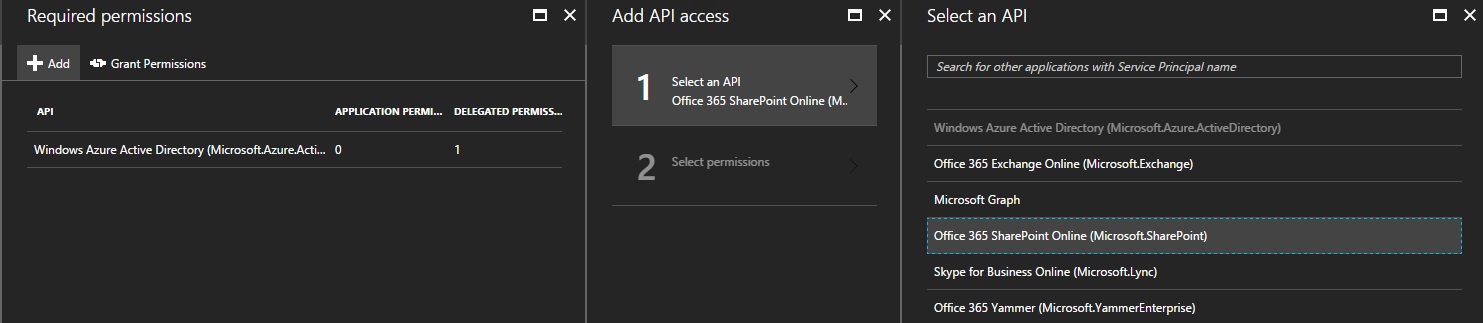
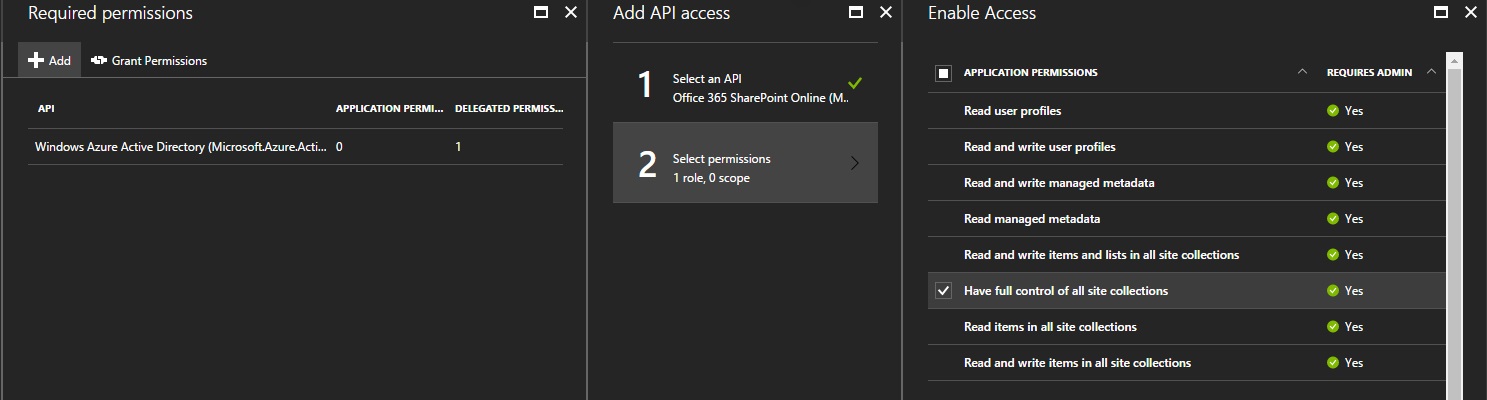
Select Office 365 SharePoint Online (Microsoft.SharePoint) and Have full control of all site collections in the Application Permissions section. Finally, we need a Key. Back in the settings blade, click on Keys, add one, and copy the value (it’s only visible once). We now have everything we need to configure Postman.
Configure Postman
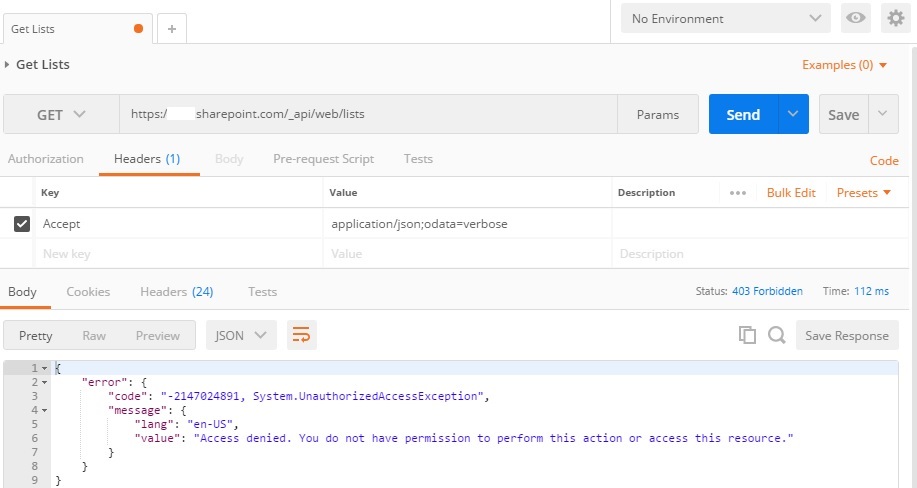
Back in Postman, create a new request. In this case, I’ll just try to retrieve every lists of the root site of my SharePoint Online tenant. The request looks like that :
HTTP Method :   GET
HTTP Request :  https://<tenant>.sharepoint.com/_api/web/lists
Headers :
Accept          application/json;odata=verbose
Click ‘Send’, and obviously, you should get an Access denied.
Go to the Authorization tab (next to the Headers tab), select Oauth 2.0, and click on Get New Access Token. You should get the following form :
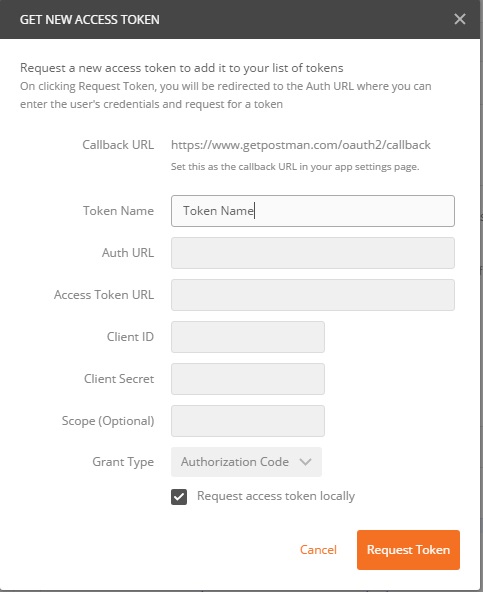
The Token Name is just a friendly name for the Token. The Auth URL is used to Authenticate to Azure AD, and the Access Token URL is used to retrieve the Bearer Token. Everything about these two URLs is explained in the official documentation. When requesting an Access Token, the Auth URL must have a resource parameter instead of a scope parameter (cf doc), that’s why I’ll leave the Scope blank, and instead, add a query string parameter resource in the Auth URL. My form will look like that :
Auth URL :           https://login.microsoftonline.com/common/oauth2/authorize?resource=https%3A%2F%2F<tenant_name>.sharepoint.com
Access Token URL :   https://login.microsoftonline.com/common/oauth2/token
Client ID :          <Application_ID>
Client Secret :      <KEY>
Grant Type :         Authorization Code
Don’t forget to replace the <tenant_name> in the Auth URL, and you may have to “URL Encode” the Client Secret if it’s not safe.
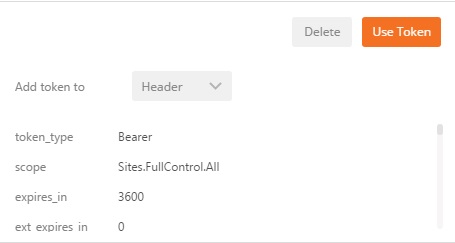
Check the box Request access token locally and click Request Token. You will be asked to Sign-In with an admin account, because, as shown in the screenshot when granting permissions to the application in Azure AD, an admin consent is required for the permissions I asked.
The token should be available in the Authorization tab. To use is, just select Add token to Header instead of URL, and click on Use Token.
That’s is, if you send your request again, the Access denied should be gone.
Azure AD v2.0
You can also use the v2.0 endpoint of Azure AD.