Install SharePoint 2016 binaries using DSC and Azure Automation
PowerShell Desired State Configuration (DSC) is a powerful way to deploy, configure, and manage your servers in a declarative way. Azure Automation adds an orchestration and management layer on top of DSC, and allows you to scale your DSC nodes nicely (Azure, On Premises, Windows, and even Linux. Lately, I have been using DSC to install and configure SharePoint 2016 servers, using the “SharePointDsc” module. This post will show you how to use Azure Automation DSC to install SharePoint 2016 prerequisites and binaries on an Azure Virtual Machine.
Create an Azure Automation Account
This step is pretty straightforward. Use the Azure portal to create a new Azure Automation Account.

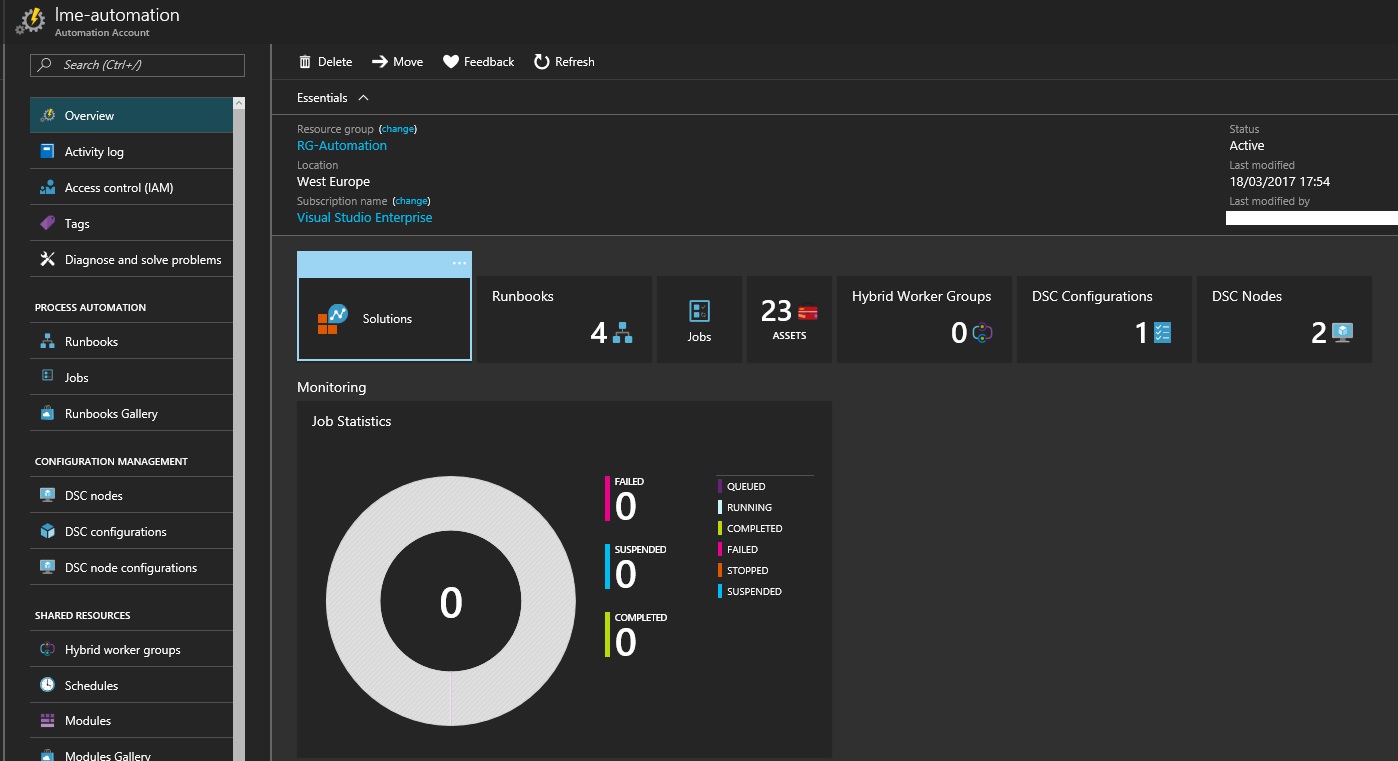
The landing page of the Automation Account should look like that:
Add the SharePoint DSC Module
In order to use the SharePoint DSC module, you have to add it as a Module in the Assets section. Since it’s available in the PowerShell gallery, I’ll import it from there, but you can also import custom DSC modules manually. Click on Assets > Modules > Browse Gallery, search for SharePointDSC, and click Import.
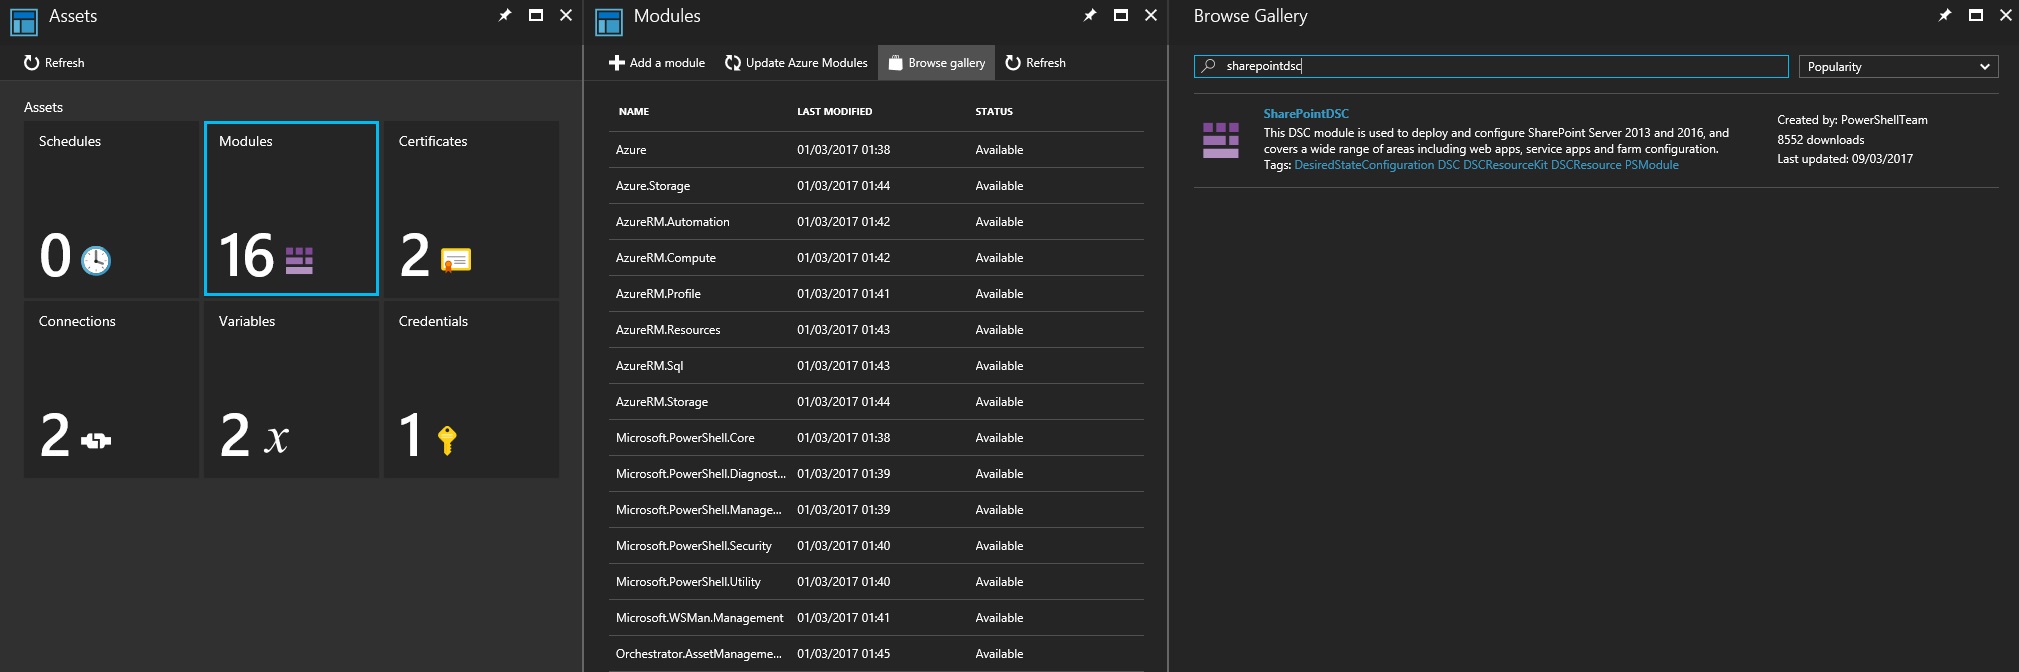
You should now see it in the Modules list.
Create the DSC configuration
We need a few things to install SharePoint 2016 Prerequisites and Binaries. A Source Path, which is the folder where you extracted the SharePoint 2016 ISO, and a Product Key. On the landing page of your Automated Account, click on the Variables tab of the Assets section and create two variables :
Name: SPBinariesPath
Type: String
Value: <network path to SP 2016 binaries> //Root path of a SharePoint 2016 iso, containing Prerequisiteinstaller.exe and Setup.exe
Name: SPProductKey
Type: String
Value: <SharePoint 2016 Product Key>
Encrypted: Yes
I’m going to use a virtual machine joined to a domain, like the one I created before (the ARM template is also available here).
I can now create the DSC Configuration file:
Configuration SharePoint2016Farm
{
    param(

    )

    Import-DscResource -ModuleName SharePointDsc

    $binariesPath = Get-AutomationVariable -Name 'SPBinariesPath'
    $productKey = Get-AutomationVariable -Name 'SPProductKey'
    $preReqPath = Join-Path $binariesPath -ChildPath "Prerequisiteinstaller.exe"

    node localhost {
        SPInstallPrereqs InstallPrerequisites
        {
            InstallerPath     = $preReqPath
            OnlineMode        = $true
        }

        SPInstall InstallBinaries
        {
            BinaryDir  = $binariesPath
            ProductKey = $productKey
            DependsOn = "[SPInstallPrereqs]InstallPrerequisites"
        }
    }
}
A few things to point out :
- My variables are retrieved using the Get-AutomationVariable command.
- If you set the binaries path to a network location, don’t forget to grant permissions to the computer on the folder (the installation is performed using the local system account). Otherwise, you’ll get an Unauthorized exception. In my setup, I shared a folder on another virtual machine and set permissions to read for Authenticated Users (it includes computer accounts).
- There’s two resources in my node, with a dependency to ensure that Prerequisites are installed before Binaries.
- The prerequisites are retrieved online. Take a look at the documentation if you want to perform an offline installation.
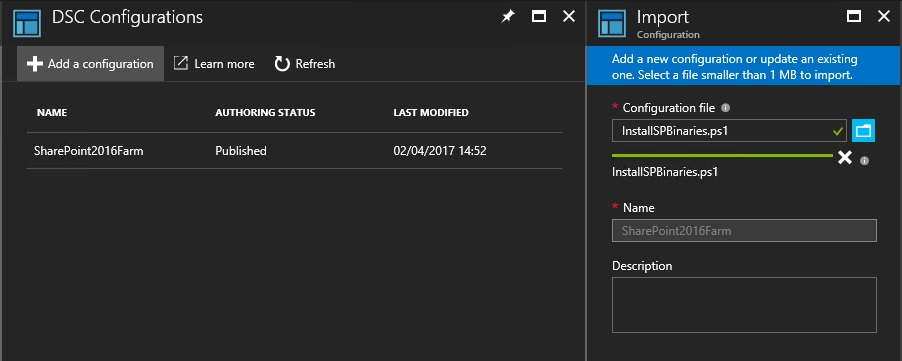
Save the .ps1 file locally.
Add the DSC Configuration
Go back to the portal, and in the DSC Configurations section of your Automation Account, click on Add a configuration, and import the .ps1 file you just saved.
Click on Compile. You will be asked to enter the Name of the credential you created before (in my case, SPInstallAccount).
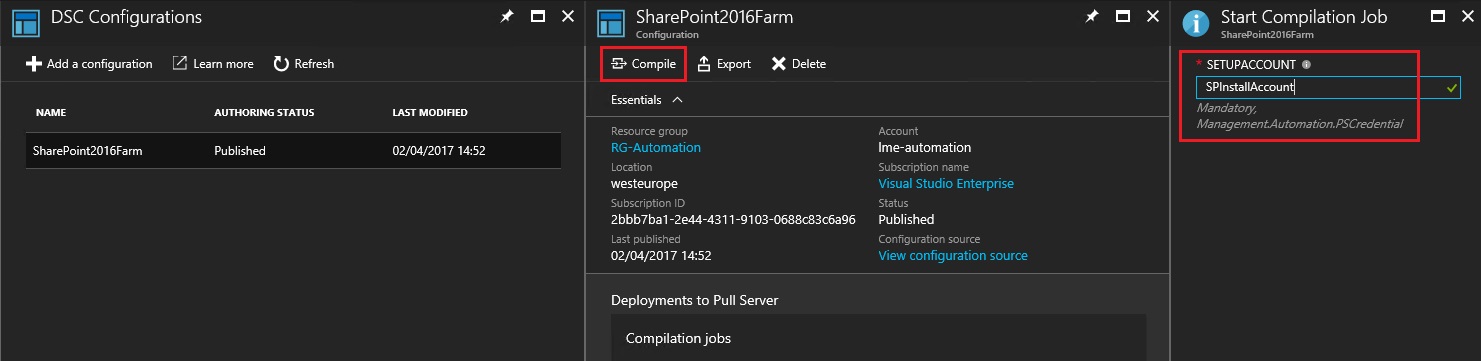
Click OK, and wait for the compilation to complete. The DSC Configuration is ready.
Onboard a virtual machine
As I said before, the virtual machine I will onboard is a clean Virtual Machine on Windows Server 2016, created with this ARM template. Click on DSC Nodes

Click on Add Azure VM, Select virtual machines to onboard, then Configure registration data.
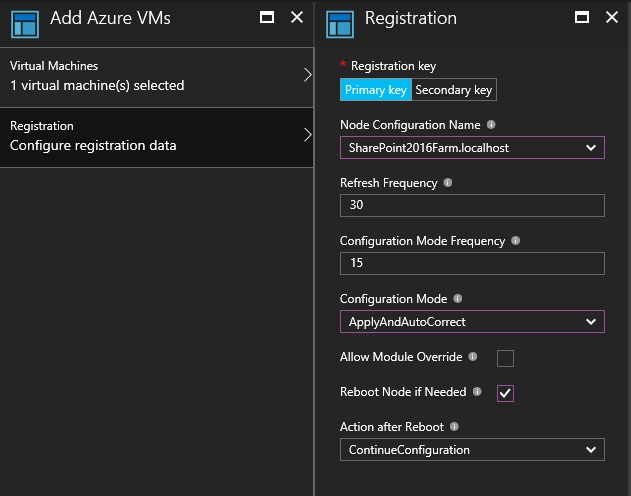
Pick the Node Configuration Name you just added, select the ApplyAndAutoCorrect or the ApplyAndMonitor Configuration Mode, and don’t forget to check Reboot Node if Needed since SharePoint prerequisites need 2 or 3 reboots to install. Make sure ContinueConfiguration is selected for Action after Reboot. Click Create.
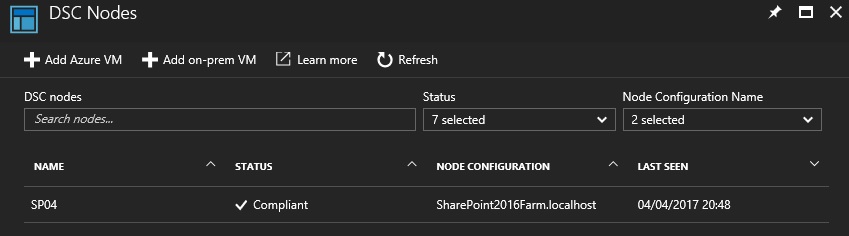
Your virtual machine should be Compliant after 15-20 minutes, with SharePoint installed.
Troubleshooting
If a DSC Configuration fails, you can find logs in the Event Viewer of the machine in Applications and Services Logs > Microsoft > Windows > Desired State Configuration. If you update a variable or a credential, make sure to recompile the DSC Configuration.