SharePoint Online webhook implementation using Azure Functions - part 2
This is the second post of the series, showing a full implementation of a webhook in SharePoint Online using Azure Function, as an alternative to remote event receivers. We’ll see in this post how to authenticate to Azure AD from a Function using certificates, how to retrieve the changes on a SharePoint list using the Get Changes pattern, and how to use Azure Cognitive Services to analyze an image and get its description.
SharePoint Online webhook implementation using Azure Functions - part 1
SharePoint Online webhook implementation using Azure Functions - part 2 (this post)
As I said in the first post, the scenario is :
- A user upload an image in a document library
- A webhook is triggered and a notification is sent to an Azure Function
- The Azure Function acknowledged the notification and put it in a Service Bus Queue
- Another Azure function is triggered when an item is added to the Service Bus Queue
- The second Azure function read the notification, retrieve the image, and send it to Azure Cognitive Services in order to get a description of the image
- The second Azure function write back the description of the image in SharePoint (I assume there’s a Description column added to the document library)
We start the post at the 4th bullet point, which is create an Azure Function triggered when an item is added to the Service Bus Queue we created before.
The full code is available on GitHub.
Create an Azure Function triggered by a Service Bus Queue
You just have to use the ServiceBusQueueTrigger - C# Template when creating the function (mine will be called func-processQueue) . The connection string required is not the same as the one we used in the first part in the Azure Function. Here, we need a connection string to the Service Bus itself and not the queue (that’s why we’re asked to provide the Queue name as well).
The UI allows you to select the Service Bus you created earlier, and will add a variable in the App Settings section. Provide the Queue name, and you’re all set.
Once created, you can see there’s a string myQueueItem in the parameters of the Main function. It represents the item just added to the queue. For us, it’s a notification from SharePoint Online which looks like that (exemple taken from Office Dev Center)
{
   "value":[
      {
         "subscriptionId":"91779246-afe9-4525-b122-6c199ae89211",
         "clientState":"00000000-0000-0000-0000-000000000000",
         "expirationDateTime":"2016-04-30T17:27:00.0000000Z",
         "resource":"b9f6f714-9df8-470b-b22e-653855e1c181",
         "tenantId":"00000000-0000-0000-0000-000000000000",
         "siteUrl":"/",
         "webId":"dbc5a806-e4d4-46e5-951c-6344d70b62fa"
      }
   ]
}
In order to deserialize it, we add tree class to our function :
public class ResponseModel<T>
{
    [JsonProperty(PropertyName = "value")]
    public List<T> Value { get; set; }
}

public class NotificationModel
{
    [JsonProperty(PropertyName = "subscriptionId")]
    public string SubscriptionId { get; set; }

    [JsonProperty(PropertyName = "clientState")]
    public string ClientState { get; set; }

    [JsonProperty(PropertyName = "expirationDateTime")]
    public DateTime ExpirationDateTime { get; set; }

    [JsonProperty(PropertyName = "resource")]
    public string Resource { get; set; }

    [JsonProperty(PropertyName = "tenantId")]
    public string TenantId { get; set; }

    [JsonProperty(PropertyName = "siteUrl")]
    public string SiteUrl { get; set; }

    [JsonProperty(PropertyName = "webId")]
    public string WebId { get; set; }
}

public class SubscriptionModel
{
    [JsonProperty(NullValueHandling = NullValueHandling.Ignore)]
    public string Id { get; set; }

    [JsonProperty(PropertyName = "clientState", NullValueHandling = NullValueHandling.Ignore)]
    public string ClientState { get; set; }

    [JsonProperty(PropertyName = "expirationDateTime")]
    public DateTime ExpirationDateTime { get; set; }

    [JsonProperty(PropertyName = "notificationUrl")]
    public string NotificationUrl { get; set; }

    [JsonProperty(PropertyName = "resource", NullValueHandling = NullValueHandling.Ignore)]
    public string Resource { get; set; }
}
Then we deserialize from the myQueueItem parameter :
ResponseModel<NotificationModel> notifications = JsonConvert.DeserializeObject<ResponseModel<NotificationModel>>(myQueueItem);
###Authenticate to SharePoint Online from an Azure function I’ ve chosen to authenticate to SharePoint Online using Azure AD, and not the Add-in registration directly in SharePoint ( /_layouts/appregnew.aspx). Since there can’t be a prompt for username / password and admin consent, the authentication will be performed using a certificate. I’ll rely on the PnP librairies to generate this certificate, and then authenticate to SharePoint Online.
First, we need a certificate. The PnP team made a bunch of scripts to help us with that. Use the Create-SelfSignedCertificate.ps1 first to generate the .pfx and the .cer files, and then, Get-SelfSignedCertificateInformation.ps1 > cert.json to retrieve all the informations we will need later. You should get something like that :
"keyCredentials": [
    {
      "customKeyIdentifier": "<Identifier>",
      "keyId": "<KeyId>",
      "type": "AsymmetricX509Cert",
      "usage": "Verify",
      "value":  "<Certificate_Value>"
     }
  ],
Then, connect to the Azure AD portal of your Office 365 subscription, and add a New Application Registration. Mine will have the following properties :
Name : az-func-webhook-app
Application Type : Web App / API
Sign-on URL : //this one doesn't matter.
Then, download the manifest of the app :
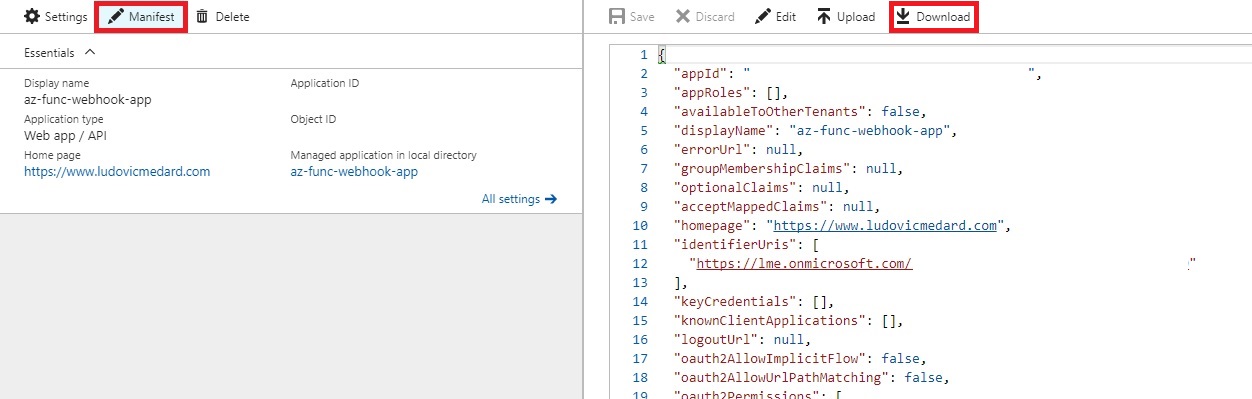
You should download the manifest and not edit it inline. When pasting the certificate value, the editor may add some carriage returns and you’ll get a 401 Unauthorized.
Replace the "keyCredentials": [], with the object you got earlier from the script, upload the manifest, and copy the Application ID.
Finally, Add permissions to SharePoint Online (I gave full control over all site collections)
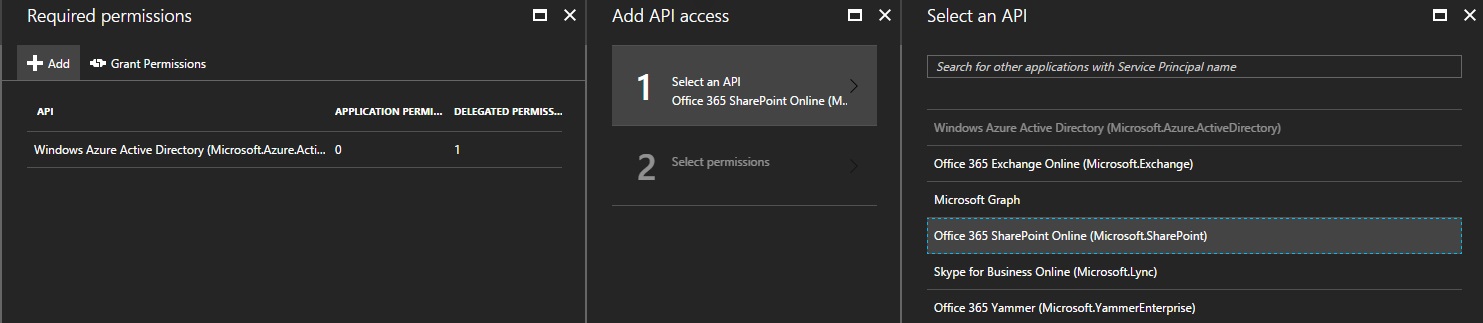
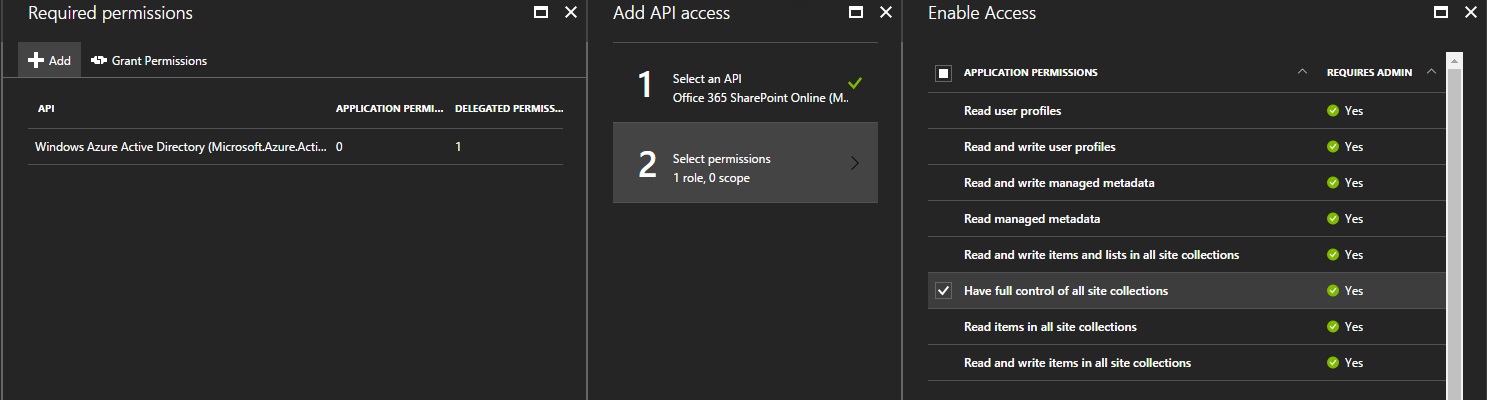
And click on Grant Permissions. Otherwise, you’ll get an Unauthorized (401).
Now, back in the function, we’ll use the PnP Authentication Manager to authenticate to our SharePoint online tenant.
Configure the Azure function used to process the queue
First, we need to add some files and configure Nuget packages
- Add the .pfx certificate to the function files
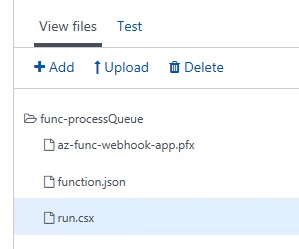
- Add a project.json file

- Edit the project.json file and add the following object
{
  "frameworks": {
    "net46":{
      "dependencies": {
        "SharePointPnPCoreOnline": "2.16.1706",
        "Newtonsoft.Json": "10.0.3",
        "RestSharp": "105.2.3",
        "WindowsAzure.ServiceBus": "4.1.2",
        "Microsoft.IdentityModel.Clients.ActiveDirectory": "2.18.0"
      }
    }
  }
}
It’s the list of NuGet packages we’ll need in our function.
The version of the ActiveDirectory package is 2.18.0. The versions 3.x seems to be not compatible with SharePoint CSOM, and I had an error trying to install any version after the 2.18.0
Now, I won’t go into details to explain the code of the function, since it’s available on Github, but here are a few things to note :
- You have to inject the
ExecutionContextin theMainfunction parameters
public static void Run(string myQueueItem, ExecutionContext exCtx, TraceWriter log)
You will need it to retrieve the absolute path of the .pfx file.
- The function uses a bunch of environment variables I put in Application settings variables
    string aadAppId = System.Environment.GetEnvironmentVariable("SPO_ApplicationId"); // ID from App registration in Azure AD
    string certName = System.Environment.GetEnvironmentVariable("SPO_Cert_Name"); // PFX file name:  az-func-webhook.pfx
    string certPassword = System.Environment.GetEnvironmentVariable("SPO_Cert_Password");  // PFX Password
    string tenant = System.Environment.GetEnvironmentVariable("SPO_Tenant"); //ex: mytenant.onmicrosoft.com
    string siteUrl = System.Environment.GetEnvironmentVariable("SPO_SiteUrl"); // SPO Site collection URL : https://lme.sharepoint.com
    string csEndpoint = System.Environment.GetEnvironmentVariable("CS_Endpoint"); //ex: https://westeurope.api.cognitive.microsoft.com/
    string csAccessKey = System.Environment.GetEnvironmentVariable("CS_AccessKey"); // The access key I get from Cognitive Services
- The authentication against SharePoint is made using PnP Authentication manager
using (ClientContext cc = new AuthenticationManager().GetAzureADAppOnlyAuthenticatedContext(siteUrl, aadAppId, tenant, cert))
{
   //code...
}
- The Get Changes pattern is used to retrieve the every changes in the Document Library since the previous webhook notification
- I stored the start token in the property bag of the doc lib
- I filter the changes to retrieve only Item Added
- For every change, I retrieve the associated List Item, and then, get the associated file
- At the end of the function, I replace the token in the property bag with the current token
- I use Cognitive Services to analyze the image and get a description
- I assume there’s a Description column in the Document Library
Additional notes
The code is not production ready, since I don’t catch exceptions, I don’t log errors, I assume every files added to the Document Library are images, etc… The goal is to focus on implementing an alternative to Remote Event Receivers.